In Part 1 we took a look at how to create a snapshot with VMWare, then use Citrix XenDesktop 7.5 and MCS to create a virtual machine template. In this second part we will look how to present this new machine to a user or group to users. This is done by creating a Delivery Group and then deploying the desktop. Let’s get started!
[wp_ad_camp_1]
- Login in to your Delivery Controller
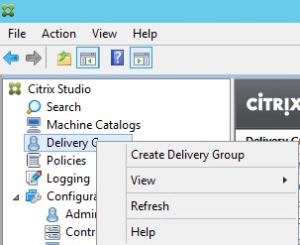
- Open Citrix Studio
- Right-click on “Delivery Groups” which can be found on the left side of your screen and choose “Create Delivery Group”
- Click Next

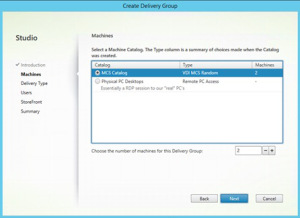
- Choose the number of machines you wish to deploy and click Next
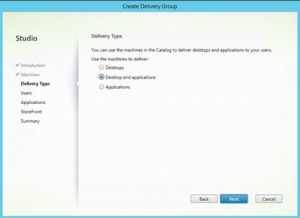
- Choose “Desktops and Applications” or which option is most suitable for your organization and this particular delivery group.
Note: The only reason to choose this option is it offers your organization the flexibility to publish both Desktops and Applications to this delivery group. This setting can be changed at a later time.
- Add Users and Click Next
Note: These can be added/edited at a later time by editing the Delivery Group if revisions need to be made.

- The catalog will check the master image for applications. Either select the applications you need or manually add any other applications required. This will depend on what your organization requires in this image and which applications are available in the image. Once you have the applications your image requires then click Next.

- Choose Manually, provide StoreFront address later and click Next
Note: This is only appropriate if you are using Web Interface. If your organization is using StoreFront then it is ok to choose the Automatic setting option on this screen.
- Fill in a Delivery Group Name and a Display Name and then click Finish
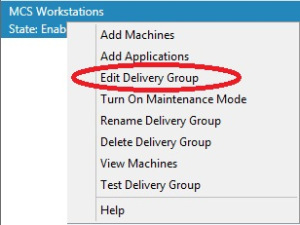
- Before testing there are a few more settings that you will want to review in the Delivery Group settings. Begin by right-clicking on the Delivery Group and then choose Edit the Delivery Group.
- Choose “User Settings” on the left. Here there are color settings, control over how many desktops per user and the time zone.
Note: The defaults shown below may be perfectly appropriate for your environment, but knowing these options are available can be valuable later on as well.
- Click on Access Policy on the left side of the screen

- Once all the appropriate settings are in place click OK
- Then go to your Web Interface or StoreFront site to test your newly published virtual machine that was created using MCS on Citrix XenDesktop 7.5
Voila! Using MCS your users are now able to launch a virtual machine through Citrix XenDesktop.


Trackbacks/Pingbacks